Hafsah shares her tips for achieving that beautiful henna pattern, and how a henna party is a sure way to make 'Eid extra special
As far back as I can remember, henna has I have always been associated henna with ‘Eid in my mind, even more so than weddings. I don’t remember a single night before ‘Eid where the ladies of our house didn’t stay up until the late hours painting our hands.
The beauty of henna aside, its blessings lie in its ability to bring women together and magnify the joy that floods special occasions like ‘Eid. Sitting together, we admire our handiwork; tease one another about weed-like patterns that may have resulted; massage one another’s hands when they cramp; chase kids who might smudge henna on the furniture; scratch one another’s backs when an itch occurs; then compare hands the next morning – whose hands stained the darkest? Henna gatherings are incredible in the way they increase love amongst women.
Seeing women with bare hands on ‘Eid makes me feel quite sad; in my opinion, everyone should have a friend or family member with some henna skills! It’s not a difficult art to master, it just requires practise and a little creativity. You don’t need to be a pro to gather people together – henna is beautiful even its simplicity. So here’s a quick henna guide to prepare you for an awesome henna gathering this ‘Eid.
Henna paste mix
Fresh henna cones are available from henna suppliers but you can mix your own if you’re feeling ambitious.
Things you will need:
30g pre-sifted henna powder
Lemon juice (fresh or bottled)
Eucalyptus oil/any essential oil
In a glass/ceramic bowl mix the henna powder with a little bit of lemon juice a little at a time, until it becomes a paste – neither too thick nor too runny (a little runnier than toothpaste)
Mix well with a few drops of eucalyptus oil.
Cover with cling film and leave in a warm place for 12 hours/overnight.
Fill empty henna cones available from henna suppliers, or you can DIY by rolling a square of florist cellophane and securing with sellotape. The mixture should make 2-3 small henna cones.
You can store henna cones in the fridge for a few days, or pop them into the freezer, but allow 24 hours thawing time.
Design tips
Henna designs may seem complex, but they are just a number of motifs repeated in different sizes with good placement
In order to avoid doodling be sure of the design before you start. There’s a lot of inspiration online, so head over to Google and print off henna designs before you start.
The best place to start a henna design is from the middle, where the main feature of the design is usually located. On the hands, begin in the middle of the palm, work up the arm and then back towards the fingers. On the legs, begin in the middle of the foot, work up the leg and then back towards the toes. This will help with placement and also prevent accidental smudging.
Henna is most beautiful when the lines are crisp and clear, and yet look effortless and curve naturally. Hold the henna cone a few millimetres above the skin with a gentle, even pressure, keeping your hand steady but not stiff. If the henna is of good quality, the paste should glide out in the direction you move it.
When drawing motifs, such as leaves or paisleys, sketch the outline of the shape before filling it in. Begin flowers from the middle and work outwards.
Never underestimate the creative power of dots when used in moderation! Triangles or tiny flowers made up of small dots can make all the difference to a pattern and are excellent fillers. Other finishing touches like lines and shading add depth to the design.
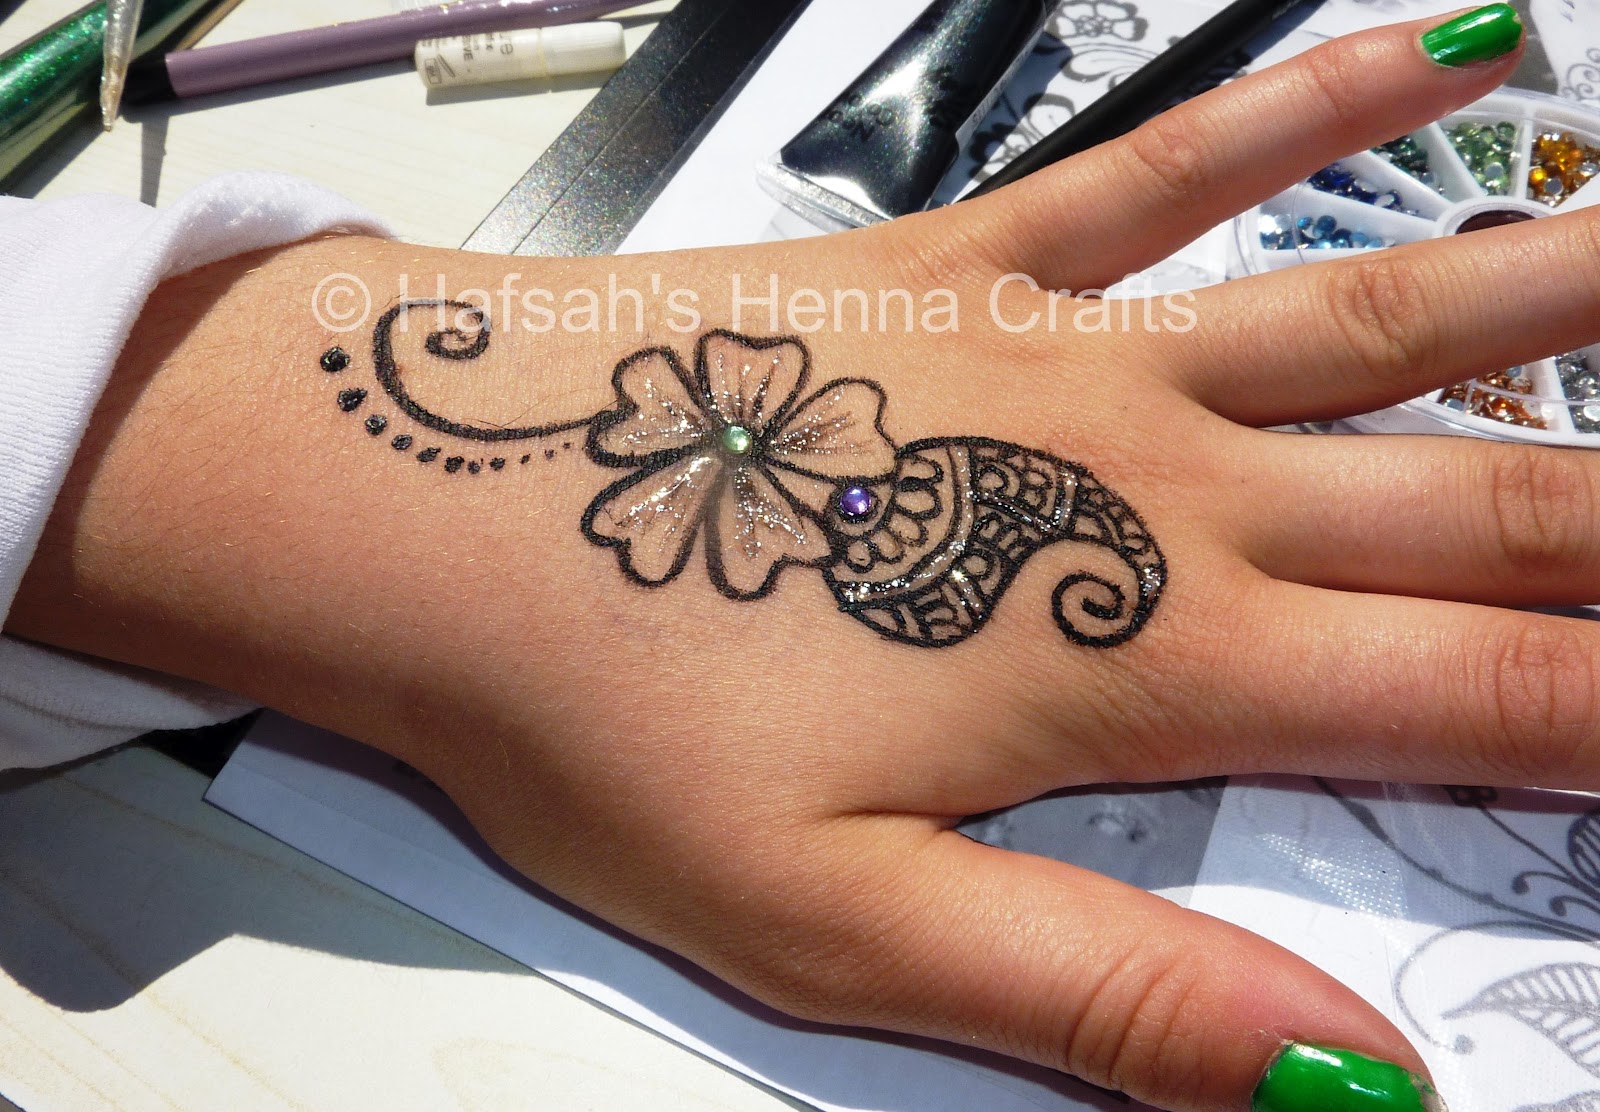
If you aren’t confident with intricate designs, then bold henna designs also look beautiful, especially large flowers, leaves or paisleys on the back of the hand.
Decorating dried henna patterns with glitter and rhinestones can really turn the henna party up a notch. Glitter cones are available from henna suppliers, and rhinestones can be glued with body/eyelash glue.
Enhancing/maintaining henna stains
Wash and exfoliate the skin before you begin – lotions and dead skin can prevent henna from penetrating the skin properly.
Once the henna is dry, mix 3 parts lemon juice and 1 part sugar in a bowl and gently pat this onto the design using a cotton ball: this will enhance the colour and prevent the henna from crumbling.
The best conditions for a good henna stain are heat and moisture: keep your body warm and keep the henna design wet for as long as possible by reapplying the lemon and sugar mixture each time it dries.
Once fully dried, wrap the area with toilet paper/bandage gauze and secure with medical tape to prevent crumbling during the night. For best results, keep the henna on for 8-12 hours.
In the morning, remove the henna by rubbing with a cotton ball dipped in olive oil.
To preserve the stain, try not to wash your hands excessively, and use rubber gloves when washing dishes. Henna can dry out the skin, so keep the area well-moisturised with oil.
Other henna uses
Henna has been used for thousands of years for medicinal purposes due to its inherent cooling qualities; applying henna to the hair and feet is not only beautifying but is also a great treatment for anyone suffering from burning sensations.
Henna on the nails is a great wudhu-friendly alternative to nail polish.
Henna has also become a broader form of art practised on various mediums beyond the body: on canvases for hanging art, on wooden boxes, even on candles to display in the home. The designs are not just limited to henna paste, but can also be translated transferred onto tote bags and t-shirts using fabric paints, or even onto cakes with an icing cone.
The artistic possibilities are endless once you’ve mastered the henna cone; not only will you be able to host henna gatherings, you’ll be able to make ‘Eid gifts and decorate some stunning cakes for an ‘Eid dinner party! Didn’t I say henna is incredible?
Hafsah is a self-trained henna artist who practises her henna skills on friends and family and for charity events. Find her at http://hennacraft.blogspot.co.uk, where she blogs about her latest projects and her journey towards setting up a henna crafts business.
Originally published in SISTERS magazine, August 2012
www.sisters-magazine.com